
David Tipling—
Ever since I took my first bird photo as a young teenager, I have never stopped learning and developing my technique. Perhaps that is one of the lures that has us hooked on taking pictures and striving for that next winning shot.
Below are a few tips that I hope might encourage some ideas, particularly if you are fairly new to bird photography and want to move on from simply capturing a sharp picture to producing images that you can truly call art!
1. Get Down Low
You can do a simple experiment with a tame subject, say a duck on a park pond, or even your own cat or dog. Shoot from above while standing, and then lay down and shoot at eye level with the animal. While the photo taken looking down creates a more detached feel, the eye level shot is more engaging, lending a more intimate feel to the image.

2. Play with Light
Experiment with the direction of the sun. Shooting into the light at the start and end of the day can produce some eye-catching images. The mood of a picture is often dictated by the angle of light. Try back and side lighting, and go for silhouette shots, too: it opens up a whole new creative world. Chances are, you will produce lots of pictures that just do not work, but now and then, by breaking the rules and going for a more striking image, the euphoric moment will come when you check the back of the camera and realize you have taken a winner!
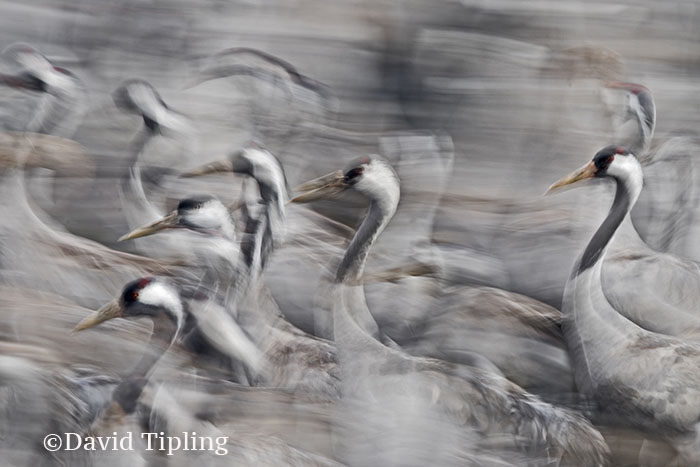
3. Experiment with Settings
Experiment with depth of field and shutter speeds. For instance, a slow shutter speed of 1/15th sec when photographing a swirling flock of Starlings can result in art! Less is more—a mantra I use often when describing composition; oftentimes, the simpler the picture, the more impact it will have. You also want to grab your viewers’ attention and not have them distracted by fussy out-of-focus elements in the background or foreground. This might mean moving a little—perhaps an inch or two up, down, or to the side—to avoid a distracting object. Using a shallow depth of field and a long lens will go a long way in creating nice, smooth backgrounds, or, if the picture warrants it, go the other way to create a big depth of field.
4. Set the alarm
Get out early! Some of the best light come soon after dawn and birds tend to be most active at daybreak. Try to plan ahead so you have an aim, and that gorgeous early light and bird activity are not wasted.
5. Be Inspired
Look at other photographers’ work and at wildlife art. Not only does this help you develop ideas for pictures, but it also helps you mold your own style, which will emerge over time. The more sources of inspiration you seek out, the broader your approach.
6. Fieldcraft
Learn the tell-tale signs birds give when they are going to take off or exhibit another interesting piece of behavior, so you can anticipate a moment of interest. For example, ducks, geese, and swans will always give a signal to other birds in their group when they are about to take off—normally, this is a bobbing of the head. Birds of prey will typically defecate and ruffle their feathers, and any big bird will position itself to take off into the wind. By learning these signs, you give yourself a far greater chance of readiness to capture the action.
David Tipling is renowned for his wildlife photographs and writings and is coauthor of the critically acclaimed Birds & People. David offers photo tours and workshops in North Norfolk. Visit www.norfolkphotosafaris.com. To read David’s blog and view more of his work, visit www.davidtipling.com. He lives in Norfolk, UK.
Further Reading:

 Between Memory and History